Saturday, September 14, 2013

Mid-Autumn Festival


Mid-Autmn Festival is today! Well.. we're celebrating it early today since I'm off to college next week! After a few trial of mooncake, I finally got the right texture! These mooncakes are soft, but firm enough so they are easy to shape and not rip.
I made 5 kinds of snowskin: Carrot, green tea, milk, custard, and thai tea.. (Listed from the softest skin first) For the thai tea, I mixed store bought thai tea with the milk/condensed milk mixture since it was too sweet. However, the taste was not as fragrant in the mooncake. 

I finally found the mooncake molds! They are a lot tinier than the mooncake mold I had before, but they are much deeper. To have the mold come out perfectly, the skin was about 10-12 grams with the filling at 20-22 grams. (The types of snowskin varied in weight). Ultimately both combined equal to 34 grams. Anything more overfilled. 

Sunday, September 8, 2013

Snowskin Mooncake with Mung Bean Filling


My 2nd patch of snowskin mooncakes. It's the same recipe as before, but the process of making it is different. Instead of adding the water portion one at a time I mixed the milk and condensed milk together, poured it gradually in portions, and then added the oil last. Before steaming it I whisked it a few times so the oil wouldn't sit at the top. However when it was done there was an oily surface on top. (maybe because I waited a while until I steamed it)


I also did another trial test for the kneading/cooling. One of them was cooled then kneaded. The other was kneaded immediately after taken out of the steamer. I used a paddle to break the dough first and mixed it into a mall. I preferred this method, but I'm not sure if this made the dough a lot tougher. 

Anyway, I tested out the previous recipe and a new one (both from Christine.) The "heart" recipe  has a more tougher and a more sturdy texture. When flattening it into a dough, its has a texture similar to making potsticker (but not dry). It wasn't as smooth as the previous recipe and just a tad sticky. When putting the filling it, the dough barely stuck to my fingers even if I just washed my hands and rolled the dough.

My mold is small, unfortunately, so my ratios are quite small. It made about 14 mooncakes. (dough 20g filling 30 g) I prefer the mung bean ones because they are less sweet.

Overall
Recipe Source: Christine 

Previous recipe : very smooth, stuck to tooth, but SMOOTH
Trial 2: More tough texture, similar to the hk popular brand mooncakes, but its not smooth. 

Wednesday, September 4, 2013

Snowskin Mooncakes


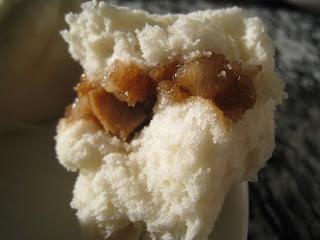
The mid-autumn festival is coming up and that means mooncakes mooncakes and more expensive mooncakes. Practically the box is worth $30 and the mooncakes are $10. The baked ones are so expensive and it would be a waste to buy a box that's not worth your money, so I decided to make them from scratch.


 After looking at the ingredients for the traditional baked ones, I switched to make the snowskin ones instead. The traditional ones uses so much butter and it's a much longer process to make the egg yolk and filling.Snowskin mooncakes in the other hand can have a lot of variety. They can be chocolate, fruit, or any of the powdered flavors (green tea, sesame, custard) The filling also has lots of choices: red bean, ice cream, taro, chocolate, you name it! 


I looked through some recipes, and much of the recipes I found were questionable. The ones with the store bought fried rice flour and shortening is just gross. Who wants to eat raw shortening...not me


Recipe Source B" Christine
Anyway it came down to two recipes: Top(trial A and bottom Trial B).  Although "A" isn't as white, it certainly is tastier and easier to work with. The dough isn't as sticky and really easy to work with. I just need to get better at wrapping them.

*Update 9/6/13
After a few days in the refrigerator
"A" got tougher and reduced  a bit in flavor   
"B" remained white, stuck to teeth, flavor remained the same


Steamed Animal Buns


I had extra dough left after from my cha siu bao, so I made some animal shaped buns.They look nice before steaming, but some poofed for too long while I was shaping the others leading it to be a bit deformed. The pig poofed the longest and looked like a it got hit by a car in the face after it steamed..
Aren't they cute!~ Well. maybe not the flower

Turtle


Hi there!~

Hmm. that's a tasty tomato
The buns have a soft texture to them, but I prefer using the mantou dough instead of cha siu since they don't have any filling in them. The mantou dough recipe is basically the flaxseed flower buns.


Steamed Cha Siu Bao & Hot Dog Buns


Hmm another day of steamed buns. Compared to the dough for mantou, cha siu bao's dough needs to be lighter and a bit more on the moist side. If the dough feels like mantou, it is going to be dense with a bit of choking feeling to it. 
Since I had extra dough left over, I used it for a steamed hot dog bun. Although the dough for hot dog buns are suppose to be the same texture as mantou dough, I prefer the dough used for cha siu bao. 

Adding a tsp of lemon juice into the dough or into the water used to steam it will result into a whiter skin. You can also spray the buns slightly with water before steaming for a smother outside layer. Since I'm just making these buns for my family, I omit the spraying part. 

I'm still getting used to wrapping the buns. Sometimes they are fully closed but most of the time I end up with one that looks like a belly button (or a rose) 

Unlike the Cha Siu Bao's you buy from stores, I omit the red food coloring and reduce the sauces. The sauces outside have more oil and sauce which gives them more of a liquid and dark appearance. I prefer a more light filling, therefore its guilt-free!

Recipe Source: Rasa Malaysia
Makes 15 buns (45g)


Baked Buns with Red Bean Filling


Back to the oven, but this time it isn't another chiffon cake. I always loved looking at bakeries, yet I never really buy much from them. Just looking at the texture and designs of the bread makes me feel full.  
So this is probably my 2nd time baking buns. The first time was a hotdog bun, but it din't have the soft texture to it. Later on I found a new recipe that uses Tangzhong. It is basically cooking flour with water until it reaches 65C. 

It makes the bread so much softer, but it is always so hard to work with since it makes the dough sticky. Unlike steaming buns, the the dough barely forms a ball in the kitchen aid mixer. The bread was quite tasty, but I highly recommend using bread flower! Using others like the HK flour doesn't give the bread that nice soft tear-apart like texture.
Bread texture with HK flour
Recipe source:Jessie (bottom) and Christine (top pic)

Water Roux Starter:
20g Flour
100g Water


Main Ingredients:
Water Roux Starter (use all)
250g Bread/High Gluten Flour
150g Milk
1 Egg
30g Caster Sugar
2g Instant Dry Yeast
20g Butter
180g Red Bean Paste(I used store-bought)
Egg Wash


Tuesday, September 3, 2013

Mini Lemon Meringue Pies


After watching Masterchef I was suddenly inspired to make these small Lemon Meringue Pie. I thought it would be fairly simple since I already knew how to make the meringue, but the results we're not what I hoped for. 
 They looked wonderful as they were put into the oven, but it was only half cooked when it came out. I'm not used to making much of American dessert, so I ended up with an uncooked pie with a cooked meringue and lemon curd.
The lemon curt gave me a slight headache, probably because the crust wasn't cooked and made it liquid-like near the bottom. I guess the only good part about this recipe is the meringue...(but that was a bit too sweet). I'm definitely not making this again. 


Lemon Yogurt Cake


 I always end up with a lot of lemon juice left over when making a Lemon Chiffon Cake, so this time I decided to put it to good use. I found this Lemon Cake recipe online and it is definitely a keeper. I wish I had taken a better picture of it though. The quality does not match how it actually looks like.I ended up with fairly lot of sauce, so I would reduce the sauce down to one lemon instead. The sides are bit no the dry side but the inside is perfectly moist. Next time I'm going to reduce the temperature down to 325F a the last 10min of baking.


Recipe slightly adapted from: Chitchatchomp

1 1/2 c. all-purpose flour
2 tsp. baking powder
1/2 tsp. kosher salt
1 c. plain yogurt (preferably whole milk)
1 c. sugar
3 eggs
zest of two lemons
1/2 tsp. vanilla
1/2 c. vegetable oil


Lemon Syrup
juice of onelemons
1/3 cup sugar


Earl Grey Chiffon Cake

After incorporating Lychee Tea into a Chiffon Cake, I thought ehh why not try it with Early Grey as well. It contains basically the same texture as the Lychee Chiffon Cake, but this time the large bits of leaves are nicely grinned. The tea leaves are basically powder so you barely taste it in the cake.
It has a fairly springy texture, and very light when consumed. 

Unlike the Early Grey Cookies, the flavor from the tea was reduced by half, which is very much to my liking. Yet, I don't think I will be using Early Grey Tea in my recipes anytime soon. I rather stick to my lemon chiffon cakes instead.  


Monday, September 2, 2013

Early Grey and Matcha Cookies

I just can't get enough of Matcha! Ever since I bought the matcha powder, I have made a matcha chiffon cake, matcha banana smoothie, and now matcha green tea cookies. Yet, I didn't get a picture of them. They were still chilling in the fridge since I left the dough out for too long. 


Compared to the Matcha dough, the Early Grey dough was much easier to work with. I think I added to much liquid into the matcha cookies so they were melting pretty fast by the time I shaped them. The texture of the cookies was very crumbly, much like a melt in your mouth kind of texture. (mostly due to the amount of butter in such a small batch of cookies) 

This was actually my first time using Earl Grey and I have to say, I'm not a big fan of it. It has a really strong taste to it that I am not used to. In addition I actually used salted butter instead and forget to omit the salt so the taste was a bit on the salty side instead. It was apparent in the Matcha flavored one than the Earl Grey. 

Recipe Source: Lou and esi
  • 1/2 cup all-purpose flour 
  • 1 tablespoons finely ground Earl Grey tea leaves/Matcha 
  • 1/8 teaspoon salt 
  • 1/8 cup (1/2 stick) unsalted butter, softened at room temperature 
  • 2 Tbsp confectioners’ sugar 


Matcha Chiffon Cake


I finally found Matcha Green Tea Powder at Berkeley Bowl! Matcha Green Tea is one of my favorite flavors. I love it in almost all recipes and I'm so glad that I could finally get a hold of it. However, it is very much on the pricey side..around 30 dollars for a pound, yikes
The first time I made a matcha Chiffon Cakes didn't end well. I didn't tare the scale correctly so I ended up with very strong matcha flavor in my cake. It certainly screamed out with it's flavor and probably the reason why I couldn't sleep at night with the excess amount of caffeine. The second attempt went fairly well. It had the right amount of matcha flavor and wasn't too sweet. The powder is has a strong matcha taste to it so adding more sugar would give it a nice balance. As always I cut backed on the sugar, leaving the taste to be more on the matcha side. 

Recipe slightly adapted from: Christine
  • 80 gm cake flour
  • 1/2 tsp baking powder
  • 5 egg yolks
  • 30 gm caster sugar
  • 1/8th tsp salt
  • 35 gm vegetable oil
  • 1 1/4  tsp green tea powder (Matcha powder), or to taste
  • 90g ml hot water (or hot milk)
Egg whites:
  • 6 egg whites
  • 50 gm caster sugar

Steamed Milk Flower Buns

It's time to move on to other recipes. After making chiffon cake for a while, it gets a bit tiring. Since my mom always makes steamed buns, I though Ayyy why not give it a try as well. 
I actually don't remember the recipe for this one. (probably because the mantou above were made from my mama instead. We added a bit of flaxseed for that extra fiber and hint of Omega 3 into our diet. It barely alters the taste though. 
These flaxseed flower steamed buns are actually my first attempt at making steamed buns on my own. My mama is usually the one who likes to make steamed buns while I on the other hand prefer baking. I had trouble twisting the buns until I finally got the distance between the cuts and the length of the dough right. Before I steamed it, they looked pretty nice. The key to getting the nice layers to fold out is the nice swab of oil before twisting, but I hate using oil so giving up a pretty bun for a less oily flavor is good enough for me
We only used the head of the scallion, so it had a really strong flavor to. Next time I'll probably add the leafy portions of the scallion for more flavor and for a more appealing look as well. Without the greens it just looks like splotches of brown.... 

*Note
  • Rolling it out in an oval shape. The wider it is the more the dough is going to overlap when you try to twist it
  • Don't forget to oil before cutting to prevent the cuts from sticking onto each other
  • Steam high for 6min and medium for 2
  • If you spray the buns before steaming, it gives a silky texture (I didn't do this since I lost my spray bottle...) 
  • ADD the leafyy part of the scallions. 
Recipe source: Wendy